I've written on more than one occasion about our family's ancient O'Henry Bar recipe. When I went back to search for my
original O'Henry Bar post, I found that after I wrote that first O'Henry Bar entry, a mere four months after starting my blog, I have made reference to O'Henry Bars on at least
40 other occasions. If that doesn't border on obsessive, I don't know what does.
Suffice to say, I love O'Henry Bars. Everyone in my family loves O'Henry Bars. Although seeing as other members of my family also have an insatiable appetite for sweet things, it's really no surprise. (For example, here's a
link to my cousin Anne Marie's new
baking blog. Once I caught a glimpse of the baked goodness that she was capable of creating, my desire to move back to Massachusetts and live next door to her, went up
ten-fold.)For that matter: everyone I've ever met in my entire life - who does not have an allergic reaction to peanuts or chocolate and is not crazy - loves O'Henry Bars.
This oatmeal, chocolate and peanut butter treat from heaven, is such a part of my heritage,
such a part of who I am, that my
son is named after them.
(Seriously,
it's true.)
Although I've written about O'Henry Bars before and have provided basic instructions on how one might set about cooking up a batch, I have never posted a visual on how these bars are made. And based on some of the feedback that I have received over the past three years, I think a tutorial might be useful, if not downright necessary.
I would like to apologize in advance for the increase to your waist size that this recipe may precipitate. However, it may also serve as a great opportunity for you to embark upon a fitness program that you've been putting off. So with that introduction, here's to your health!

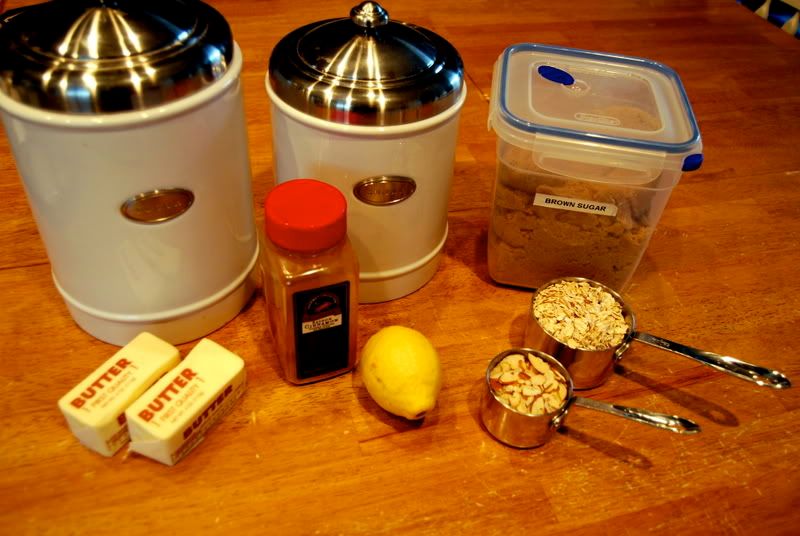
To make O'Henry Bars, you will need:
1 stick butter¾ cup brown sugar3 tsp. vanilla
4 cup oatmeal
¾ cup Karo syrupUp to 2 cups of chocolate chips
Up to 2 cups of peanut butter (smooth
or chunky)
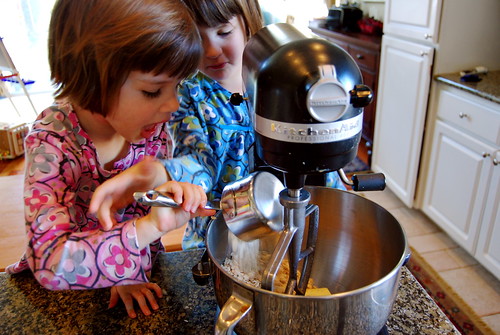
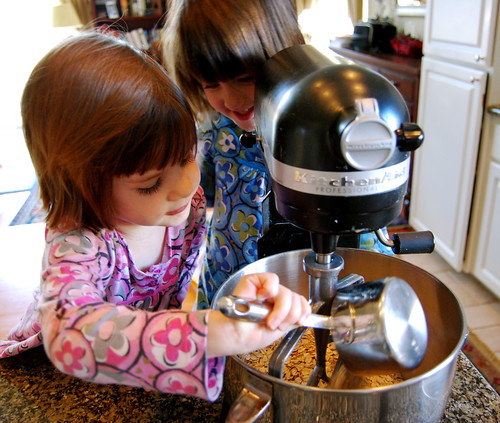
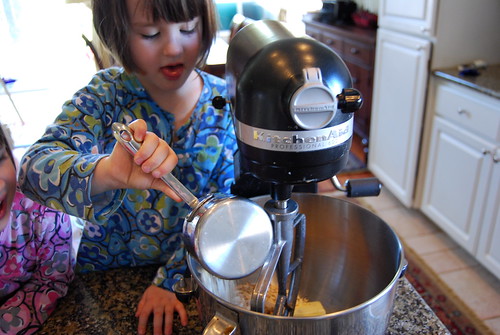
** Warning: Small helpers are useful and fun to have around, although they will rapidly diminish your chocolate chip supply if left unguarded.**
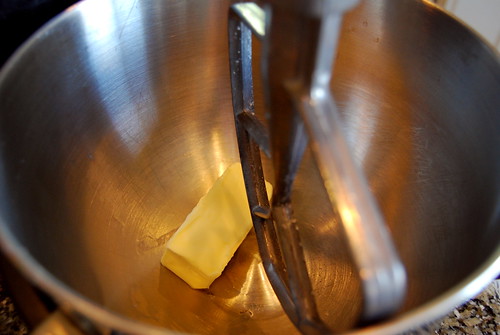
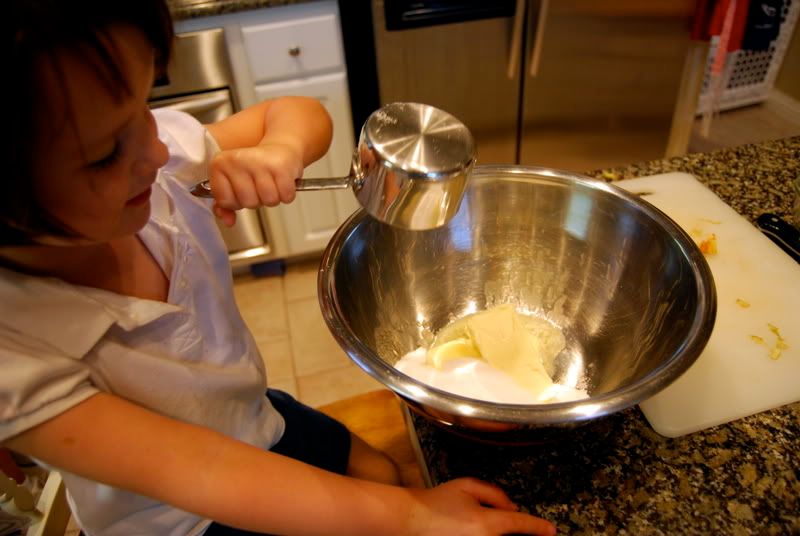
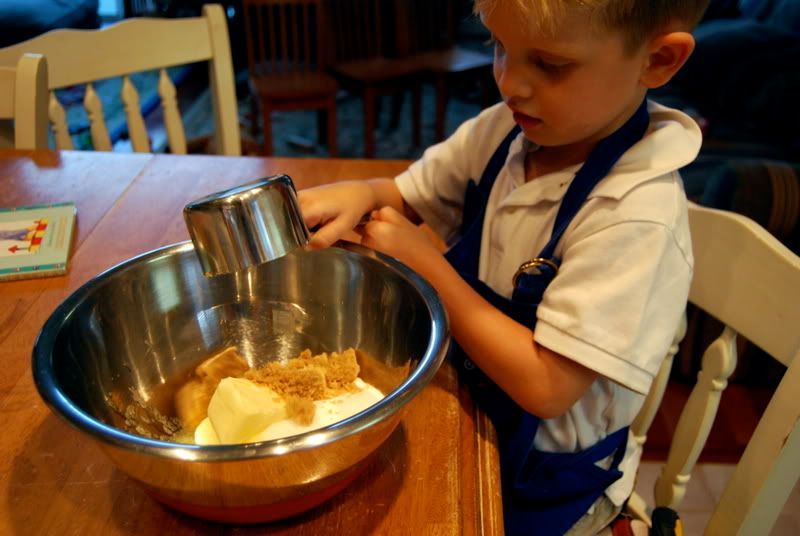
In a large mixing bowl -
or preferably, KitchenAid mixer - add a stick of butter.

Then add in
¾ cup of brown sugar.
 Add in your 3 teaspoons of vanilla
 - but beware that if your small helper assisted you with adding the aforementioned stick of butter, their little hands might be especially slick and you may lose your measuring device. Fear not. Just fish it out.
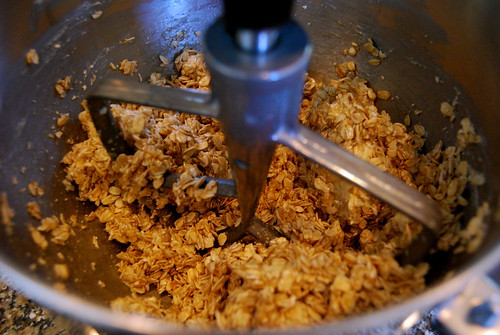
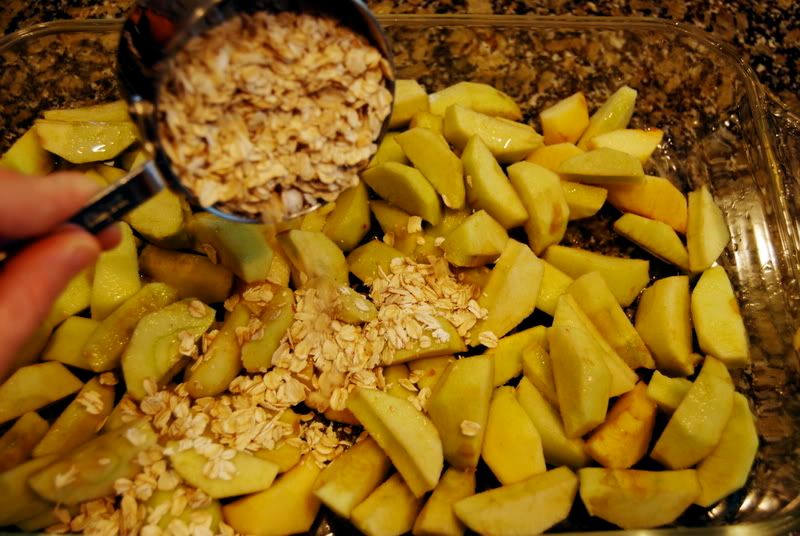
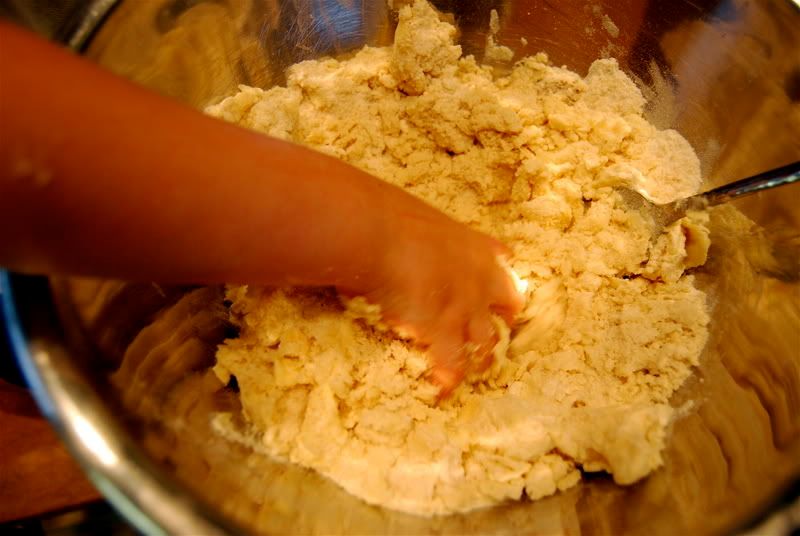
 Add four cups of oatmeal.
 One cup ...

Two cups ...

Three cups...

Four cups.

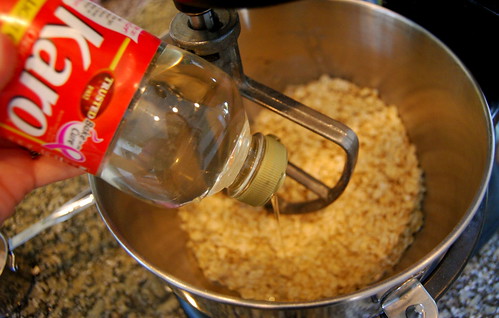
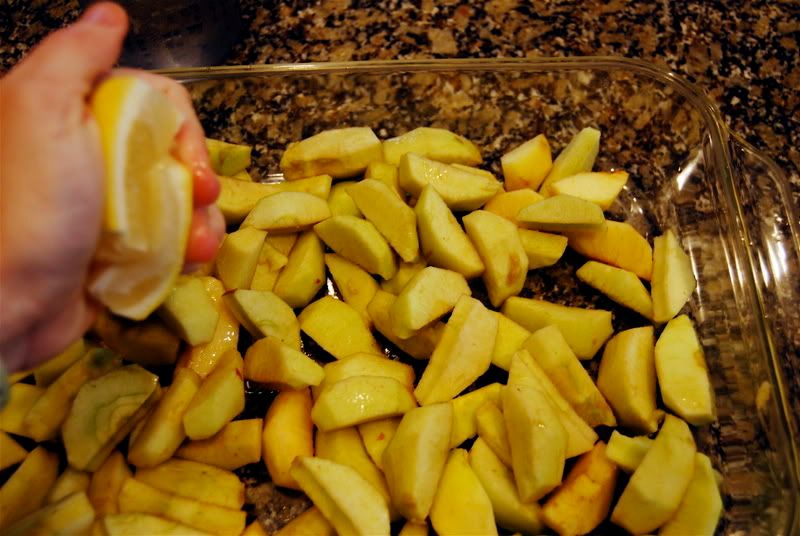
Now, you'll need to add
¾ of a cup of Karo syrup. But if you are anything like me, you will just pour that Karo Syrup directly in to your mixing bowl because you can never get all the Karo out of your measuring cup, or off your spoon, and this way - you save yourself
something to wash.
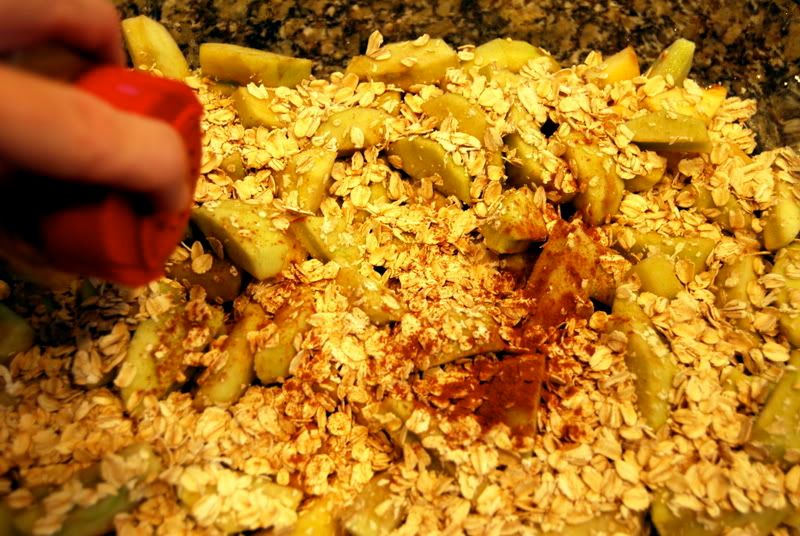
(Notice the pink breast cancer ribbon. Making O'Henry Bars is helping to raise money for cancer research. Could I just bake for a cure instead of run for a cure?)

Grab a spoon and start stirring.
Or, turn on your KitchenAid mixer and let it work it's magic. 
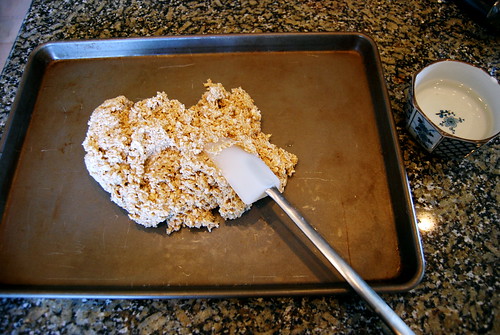
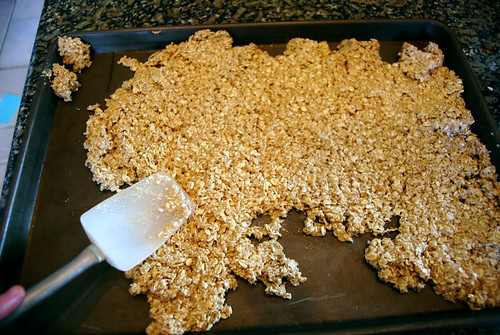
Once everything has been thoroughly mixed, pour (dump?) this concoction on to a rimmed un-greased cookie sheet. Then, using a spatula - or a spoon - or your hands, begin the process of spreading the oatmeal base. Because of the Karo, you might find that the oatmeal base is very difficult to distribute and sticks to
everything.
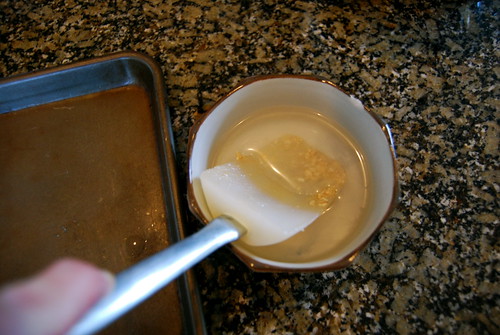
I have found that it helps the spreading process
significantly, if you frequently dip your spatula (or spoon, or hands) in to a small bowl of water. You don't want too much water on your spreading utensil, but just enough so that it's not as sticky.

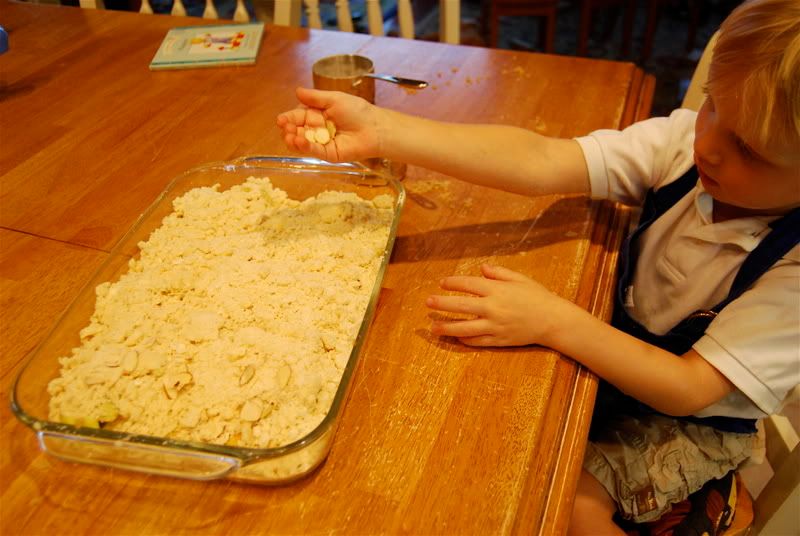
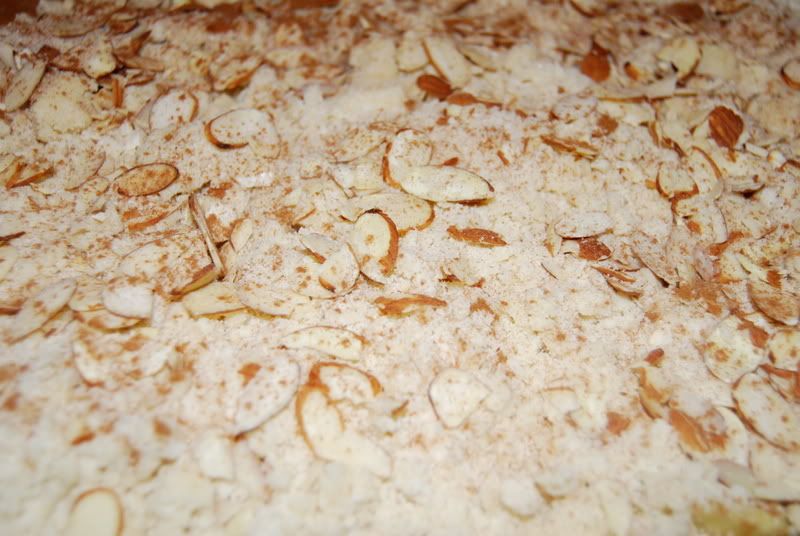
Continue the spreading process until every square inch of your ungreased cookie sheet is covered with the oatmeal base.

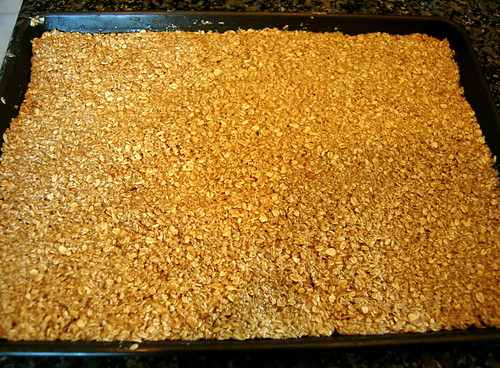
It should look like this.

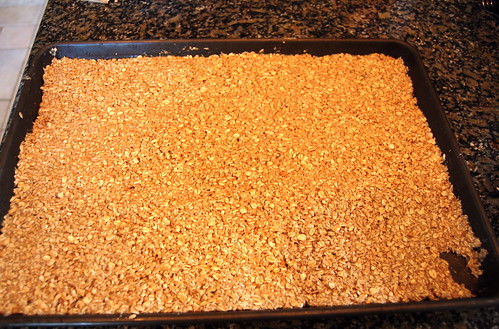
Although, it might look like this if you decide to taste the oatmeal base.

Or like this if you determine
WOW that is good.

But before you place your cookie sheet in to a pre-heated 350 degree oven for 10 minutes (not a minute less, not a minute more), you'll want to be sure that there are no gobs of oatmeal base missing.
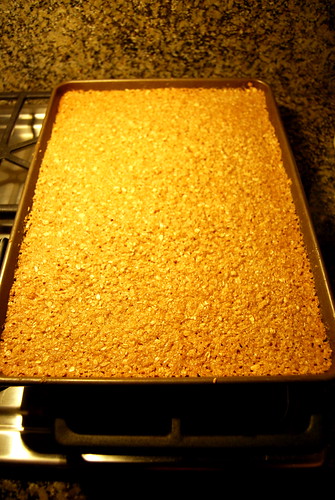
Once your base is evenly distributed, place it in a pre-heated 350 degree oven for 10 (TEN) minutes, maximum. Do not overcook these or they will be way too hard and might break your teeth. When the bars are done, remove them from the oven and set them aside to cool.

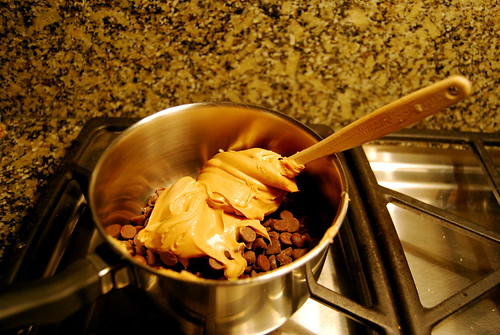
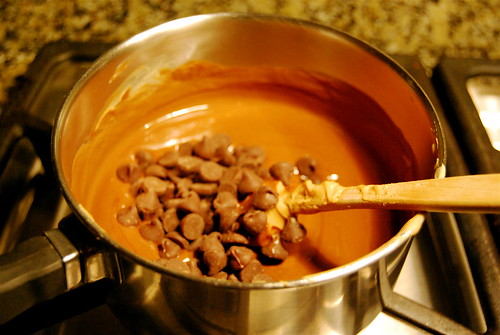
Now. In a saucepan, mix together approximately 1 cup of chocolate chips ...

With approximately one cup of peanut butter.
I'd like to add in here, that much like the Karo Syrup issue above, I do not measure out the
exact quantity of peanut butter because a precise measurement is too difficult to accurately gauge. So, I just ration out what I
believe to be approximately one cup of peanut butter.

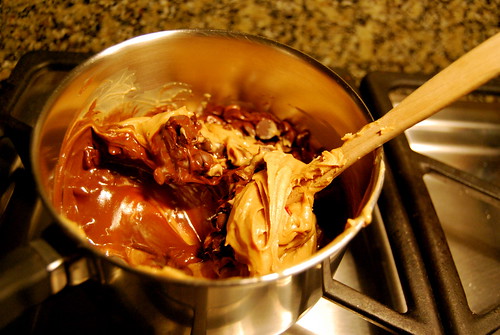
Then you'll turn the stove on low, and while continuously stirring, let the peanut butter and chocolate chips INFUSE together.
Oh! Dear! God! 
My heart is skipping out of my chest just looking at this picture.

As for me, I test the peanut butter / chocolate chip mixture pretty frequently and prefer it to be a little more peanut-buttery.
(Oh, and notice my saucepan? That was a gift from my sister Beth the year I moved away to college. I think she picked up an entire set of Faberware at Filene's Basement in the late 70's. Thirty years later, they still work great. Thanks again, Beth!!)

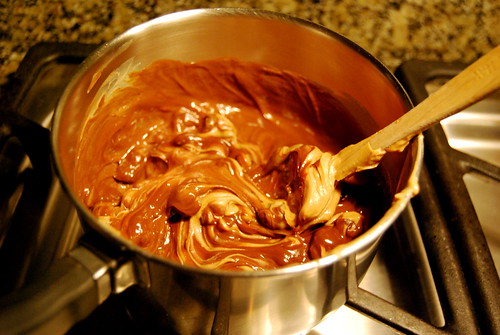
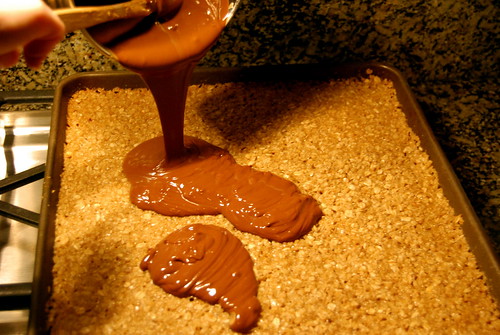
Once your peanut butter / chocolate ratio is just where you want it, pour the mixture over your cooled oatmeal base.

Then, using a spatula - or spoon - but preferably not your hands, begin the process of evenly distributing the chocolate topping.

When completed, your cookie sheet should look something like this. Notice there are no divets or obvious undulations to indicate that I ate half of the uncooked base.

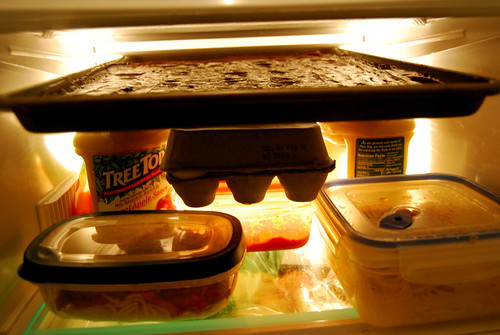
You will then want to put your cookie sheet in to the refrigerator to cool. Typically, it takes at least an hour before they are ready to be cut up in to squares, although, I have witnessed people diving in to a tray of not-fully-cooled O'Henry Bars after less than 10 minutes of refrigerator time.
OK. Fine. It was me.

I would really love to show you what a picture of the finished bars looks like, but alas, as I was standing up from taking the picture directly above, I fumbled my Nikon SLR and it landed on our tile floor with a CRASH. This is the last picture that was snapped off a millisecond before my LENS
broke off the camera. And trust me, if it wasn't for a tray of O'Henry bars in the refrigerator right now,
I would still be crying.

The purpose of this Favorite Thing Friday post is two-fold.
First, to share with the world one of my favorite recipes. Second, to share with the world that one of my favorite kitchen appliances is my KitchenAid mixer.
We bought our KitchenAid a week before our triplets turned one. Up until that time, I could never rationalize why we needed one of these professional mixers that grace the kitchens of people who actually know how to cook. Sure, I would have loved to have owned a KitchenAid, but they are rather pricey and I had never been terribly opposed to mixing things the good old fashioned way. Mostly because I didn't KNOW better.
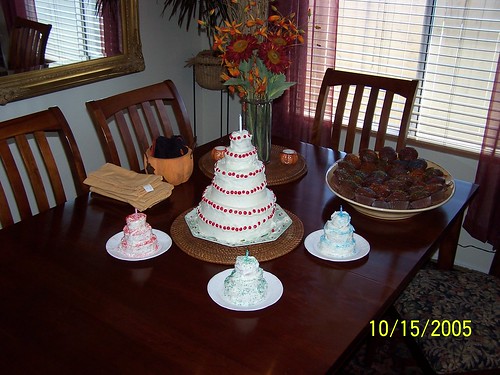
But when Charlie had decided that he was going to bake his family's ancient tradition five-tiered, one-year birthday cake for our children, we were told that in order to make the batter, we would absolutely, positively need a large capacity KitchenAid mixer.
 We also needed specially sized baking pans and a host of cooking supplies and ingredients that I thought for sure we'd never use again.
 Unless of course we had another baby. Which lo and behold we did, but due to our being on a huge road trip, three thousand miles from home when our baby turned one, he shared a sheet cake with his grandmother, that was decorated in patriotic colors.
So we bought a KitchenAid and four years later, I cannot imagine my life without it.
And whenever I was directed to this post yesterday on the King Arthur Flour website (thanks Amanda) I jumped out of my seat with joy. LOOK!! Here's one more thing I can make with my KitchenAid!! (And one more reason I must NEVER stop running.)
Do you like it?
Do you want one?
Now that Charlie and I have reached our fundraising minimums (or will once the bundle of checks we've received are deposited), for a minimum $5.00 online donation to The Leukemia & Lymphoma Society via
Margaret and a comment left on
THIS post, you will be entered in to a raffle to win a
KitchenAid Artisan Series mixer, in your choice of color. (If you donate $10.00 you will be entered twice; $20.00 four times and so on.) If you select pink, KitchenAid will make an additional $50.00 donation to the Susan G. Komen Breast Cancer fund.
The retail value of this mixer is $350.00.

But for a minimum $5.00 donation, you can enter this contest to win one.
Your donation is 100% tax deductible. Your donation is fueling research for a cure. And seeing as the most recent update from
Deana indicates that the newest round of "emerging" treatment that she has been receiving is having a dramatic effect against her highly aggressive cancer, your donation
will help someone live a longer life. I can't think of anything more awesome than Deana winning this fight and watching those two beautiful little boys grow up.

If you have concerns with donating on line, you can write a check made payable to The Leukemia & Lymphoma Society and mail your donation to:
The Amazing Trip to Cure Cancer
2220 Otay Lakes Road
Suite 502, PMB #99
Chula Vista, CA 91915
However, if you chose to donate online, please add KA next to your name so that is clearly visible.
The winner will be announced on Wednesday, April 1.
*******
Please for the love of all that is good and right, help us spread the word. It is our goal to not only reach our fundraising minimums but to EXCEED them. By forwarding the link to this post to anyone you know who doesn't have a KitchenAid mixer but sure would like one, you will earn yourself a special place in the heart of anyone who has been touched by cancer.
OK, ready ... set ... GO!
This concludes the longest post I have ever written. Now, I'm off to eat an O'Henry bar and mourn the loss of my lens.